Kitchen cabinet refacing is the ultimate architectural “hack”. By preserving your structurally sound cabinet boxes, you can only replace the visible face frames, doors, and drawer fronts. Your renovation budget gets down to nearly half of a full kitchen renovation without sacrificing aesthetics.
However, Texas’s variable humidity and adhesive bond challenges can make it a peeling disaster. The line between a successful DIY project and a costly mistake is very thin. Whether you’re a DIY enthusiast or a homeowner searching for professional cabinet refacing services, I’m here to help you with all the knowledge to transform your kitchen from the inside out with refacing.
TL;DRCabinet refacing is a high-ROI “architectural hack” that saves 50% over full replacement by upgrading doors and veneers on existing frames, provided you navigate the technical precision and high-humidity adhesive challenges unique to the Texas climate. |
What Cabinet Refacing Actually Involves
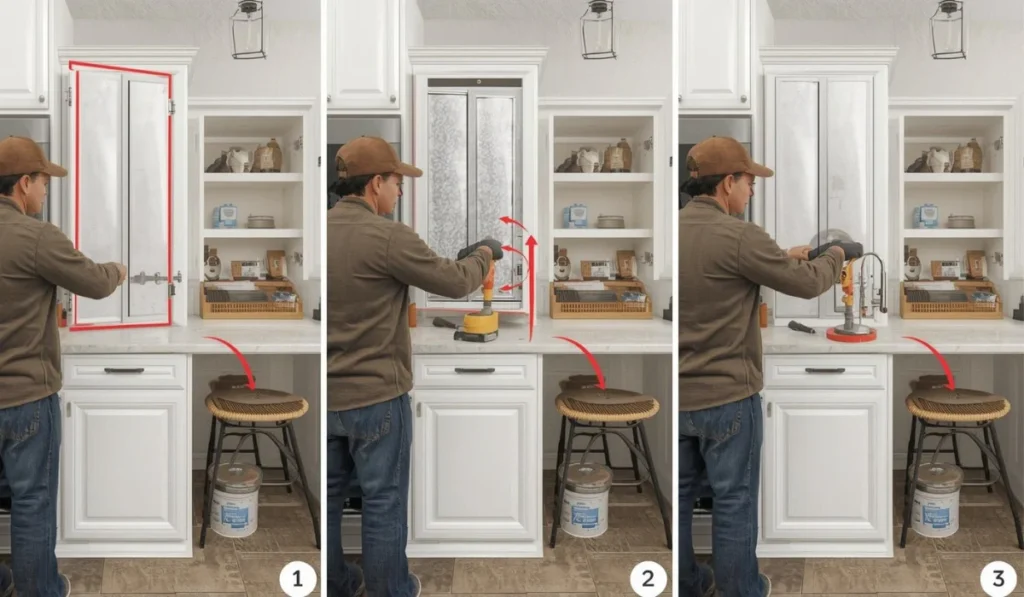
Cabinet refacing has three primary steps:
- Removing old doors and drawer fronts
- Applying a matching veneer or laminate to existing cabinet boxes and face frames
- Installing brand-new doors, hinges, and hardware
It is basically a “facelift” for your cabinetry. You don’t need to tear out the entire structure. Instead, you or expert carpenters focus on the visible “skin” of the kitchen.
The Anatomy of a Reface
- Cabinet Boxes & Face Frames: They stay in place. However, they have to be structurally sound, level, and free of water damage.
- Veneer Application: You can use high-quality wood veneer or rigid laminate sheets. Permanently bond them to the face frame stiles and rails.
- Component Swap: Get entirely new cabinet doors and drawer fronts. This is where you can change the style of your kitchen. For example, you can move from a traditional raised panel to a modern Shaker style for a minimalistic look.
- Hardware Upgrade: Wanted to move from old-fashioned exposed hinges to concealed cup or soft-close ones? Refacing is the best time to do so.
Refacing is most successful when you have solid wood or high-quality plywood as cabinet frames. If it is made of thin, sagging, or crumbling particle board, refacing will just be a temporary fix.
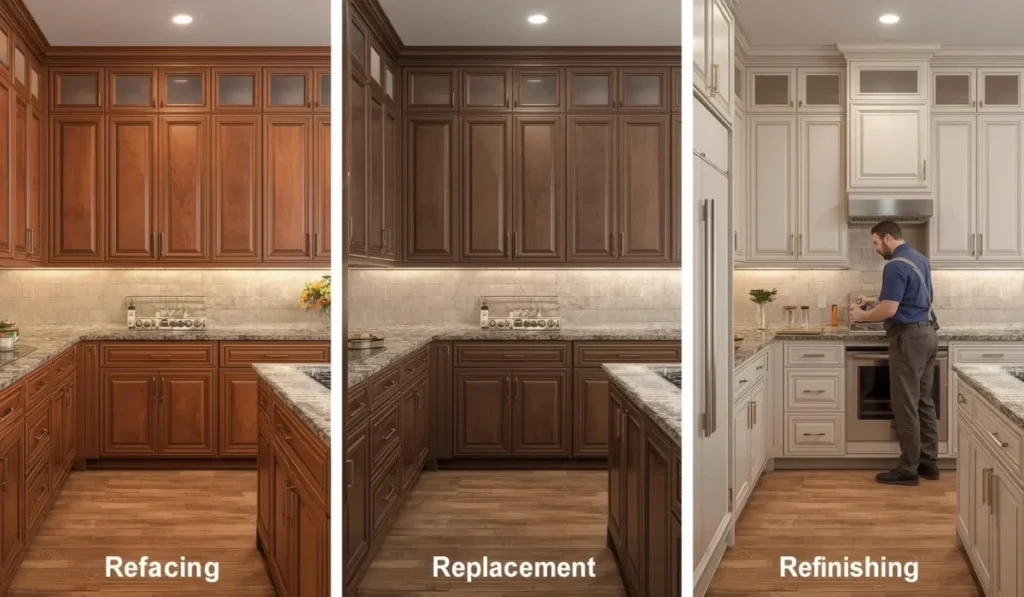
Refacing vs. Replacement vs. Refinishing
Reface your kitchen if its layout works for you, but you have outdated doors. Go for a replacement if you want to move the location of the appliances. Deciding between refinishing (painting) and refacing comes down primarily to strict budget limitations and the current door conditions.
Between refacing and replacement, the cabinet refacing cost range is the primary driver. The cabinet refacing cost saves homeowners 30 to 50% compared to a full tear-out. However, there are more factors besides just cost.
Structural Limitations for Cabinet Refacing
Before committing to a reface, you need a structural health check.
- Check Under the Sink: Check for water damage and rot. If your cabinet floor is soft, your structure would be weak to support the new veneer.
- Test for Level: Check if your cabinet boxes are significantly out of plumb. In that case, you will end up with misaligned cabinet doors regardless of the material quality.
- The Layout Test: Refacing refreshes the look, but replacement changes the function. If you want to change the work triangle of your kitchen, replacement should be your priority.
The Durability Gap
Refacing cabinets lasts longer than just painting or refinishing. Thermofoil and 3D laminates are used in refacing, which are non-porous. They are also resistant to the grease and cooking residue, which can cause your paint to peel or discolor within 2-3 years.
| Feature | Refinishing (Painting) | Cabinet Refacing | Full Replacement |
| Average Cost | Lowest | Moderate (50% Savings) | Highest |
| Durability | 2–5 Years | 10–20 Years | 20+ Years |
| Kitchen Downtime | 1 Week | 3–5 Days | 3–6 Weeks |
| Aesthetic Change | Color Only | Style & Color | Layout & Style |
The Reality of DIY Cabinet Refacing
DIY cabinet refacing costs $1,000-$3,000 for materials and 30-60 hours of meticulous labor. You can save the professional fees. However, your actual savings are lower when you consider the high risk of rework (due to measurement errors or poor adhesion).
Over the years, I’ve seen many homeowners start with a DIY kitchen cabinet refacing kit from a big-box store. But the “one size fits all” solutions often backfire for them. Soon, they realize the struggles with custom layouts and realize the need for calibrated tools.
The Essential DIY Tool Checklist
Your toolbox must include:
- Precision Cutting: A utility knife with extra blades, a laminate trimmer, and a flush-trim bit for your router.
- Adhesion Tools: A J-roller is non-negotiable for removing air bubbles and ensuring the contact adhesive creates a permanent bond.
- Preparation Gear: 120-grit sandpaper, a high-quality degreaser, and denatured alcohol to strip away years of grease and cooking residue.
- Safety First: Safety glasses, gloves, and a mask or respirator are essential, as strong fumes from solvent-based adhesives require heavy ventilation.
The Hidden Costs of DIY
The sticker price of veneer sheets is only the beginning. DIY refacing hidden costs also include:
- Material Waste: Buying “just enough” usually leads to disaster. We at Texas Pro Remodeling recommend a 10–15% buffer for material chipping or miscuts.
- Tool Acquisition: If you don’t own a router or specialized clamps, your budget will jump by $200–$500.
- The Time Tax: A professional refacing timeline is three to seven days; a DIYer often faces 3-4 weekends of a non-functional kitchen.
The Texas Climate Factor: Humidity and Adhesion
Texas’s high relative humidity (above 60%) can cause your veneer to expand. As a result, you will start to notice peeling (if you don’t manage the adhesive flash time perfectly).
Many homeowners buy into the HGTV myths of Texas home renovations of a simple, one-day sticker application. However, the reality is much more complex with better moisture management.
Texas’s moisture eventually is trapped between the cabinet box and the new skin. This layer of humidity works as a microscopic barrier. Your contact cement can’t cure currently because of the barrier. That’s why the summer heat of Texas and cabinet refacing are a difficult pairing.
The Humidity-Resistant Strategy
- Select the Proper Adhesive: Use a humidity-resistant contact adhesive specific to high-heat environments. Avoid using water-based glues. They can increase the moisture content of the plywood or MDF further.
- Maintain the Flash Time: Glue might be ready within 15 minutes in dry climates. In a humid Texas kitchen, you may need to wait 30-45 minutes. The goal here is to wait for the adhesive to be “tacky” and not wet. If you bond too early, you’ll risk trapping solvents and veneer bubbles.
- Check Moisture Meter: Before applying veneer, use a moisture meter to check the humidity in cabinet boxes. If the wood’s moisture content is above 10%, run a dehumidifier for 24 hours to stabilize the environment.
Preventing Peeling and Bubbling
You need to focus on the edges to prevent your cabinet veneer from peeling after refacing.
Apply edge banding tapes with a heat gun to make sure the glue sits perfectly into the grain. For older Texas homes, always check for water damage under the sink (or near the dishwasher). Even the best adhesive can’t stick well to damp wood.
Common Problems with Refacing (And How to Prevent Them)
The most frequent problems with refacing kitchen cabinets DIY are misaligned cabinet doors, uneven finishes, and telegraphing, where small bumps on the original frame show through the thin veneer.
1. Misaligned Doors and Drawer Fronts
This is the telltale sign of a DIY project. To avoid this, don’t rely on the old screw holes.
Fill old holes with wood filler and drill new pilot holes instead. Use a centering punch so that your cup hinges can be perfectly vertical. A 1mm error in the hinge can be a 5mm gap at the edge of the door.
2. Veneer Bubbles and Lifting
Bubbles are a result of uneven pressure during application.
Always work from the center outward with a J-roller. If you see a bubble appearing later, you can “reactivate” the glue with a household iron (using a towel as a buffer). However, preventing through a clean and degreased surface it is always better.
3. Telegraphing Imperfections
Sometimes, the grain of dust or old paint drip looks like a mountain under the new laminate. To prevent that, you need to sand the cabinet frames to a perfectly smooth finish.
Sand with 120-grit sandpaper. Do that after cleaning with a degreaser until the surface is dull and flat. Then run your hand over the frame. If you can feel a bump, you will see it through the veneer.
When to Call a Pro for Your Kitchen Refresh
You should hire a professional for cabinet refacing if:
- Your project needs structural modifications
- You need to work with high-end materials like 3D laminate
- You need a finish that mimics factory-quality cabinetry
Professional installers also complete the job in three to five days. DIY projects take weeks (or months) to complete. If time is your concern over money, a professional reface can be your consideration.
Certain complexities in cabinet anatomy and the Texas climate also make a good case against average homeowners. While the “weekend warrior” approach is tempting in these cases, professional intervention is a smarter long-term investment.
The Efficiency Gap: Timeline and Disruption
Minimized downtime with better results is the primary reason to get professional cabinet refacing services.
Professionals use a dust control plan (featuring HEPA air scrubbers and zip-wall barriers). You can use your kitchen for light meal prep in the evening during the project. A DIY project often leaves the kitchen a “construction zone” for weeks.
To create smooth edges, professionals use specialized equipment like pneumatic pin nailers and industrial-grade laminate trimmers. A standard utility knife simply can’t match that precision.
The Structural “Go/No-Go” Decision
According to industry standards, get a professional’s help if you face certain red flags:
- Hinge Plate Hole Blowout: If your old cabinet frames have stripped or blown out holes, a professional can do the structural repairs before refacing.
- Uneven Cabinet Reveals: If your cabinets are not perfectly square, a professional can adjust the reveal consistency (the gap between doors) to create a symmetrical look,
- Complex Upgrades: If you want to add a lazy Susan, swap out drawers for deep pull-out bins, or install soft-close hinges. These modifications are best handled during the refacing process by expert carpenters.
Choosing a Trusted Partner for Your Texas Home
The quality of the kitchen cabinet refacing result is only as good as the people handling it. That’s why you need an expert contractor. In the diverse Texas market, look for a partner who understands both the aesthetic trends and the environmental challenges of this region.
The Value of Local Expertise
A local contractor like Texas Pro Remodeling offers an understanding of Texas building standards and climate-specific material performance.
Look for contractors who have proof of commitment to ethical business practices and up-to-date building codes. Always verify that your contract carries general liability insurance. This protects your home and your investment during the renovation.
Avoiding the “Hard Sell”
High-quality remodeling should be a collaborative process. Avoid companies that push “one-day” miracles or high-pressure sales tactics. Instead, look for a consultant who spends time inspecting your cabinet boxes for water damage and discusses the longevity of the finish rather than just the lowest price.
Conclusion
Cabinet refacing is an investment in your home’s value and your daily quality of life. Whether you choose the hands-on path of DIY or the precision of a professional team, focusing on high-quality veneers, proper adhesion, and structural integrity will ensure your “new” kitchen stands the test of time.
Frequently Asked Questions
Can I reface my cabinets if I am also planning to install new countertops?
Yes, but the order of operations is critical. Ideally, you should reface your cabinets before installing the new countertops. Your installer (or you) can apply the veneer and end panels slightly above the current cabinet line, this way. If you already have countertops in place, a professional can still reface them. But it would need much more intricate scribing and silicone sealing at the contact points.
Is it possible to change the height or width of my cabinets during refacing?
It’s harder to change them because refacing is primarily a cosmetic upgrade. However, you can create the illusion of height with matching crown molding. For width changes, you would need to replace the cabinet box entirely.
How do I clean and maintain refaced cabinets without damaging the veneer?
Avoid saturating the seams with water. Laminates and veneers bond with specialized adhesives. To clean, use a microfiber cloth dampened with a mild solution of dish soap and warm water.
What happens if a door or a piece of veneer gets damaged a year later?
You can simply order a replacement component. Being modular is one of the biggest advantages of refacing. If a single door is scratched or a 3D laminate panel is scorched by a toaster, replace the standardized part.
Will refacing my cabinets increase my home’s resale value as much as a full remodel?
In terms of ROI (Return on Investment), refacing often outperforms a full remodel. According to real estate trends, a “minor kitchen remodel” (which includes refacing) typically returns about 70–80% of its cost upon resale. Because you are achieving a “magazine-ready” look for half the price of a full gut job, you retain more equity in your home while still significantly increasing its curb appeal to prospective buyers.