I recently inspected a home with a fresh interior remodel where a hidden leak was about to ruin the new ceilings. This experience showed me why a professional audit is so important. It protects your home by detecting moisture issues before they become costly repairs.
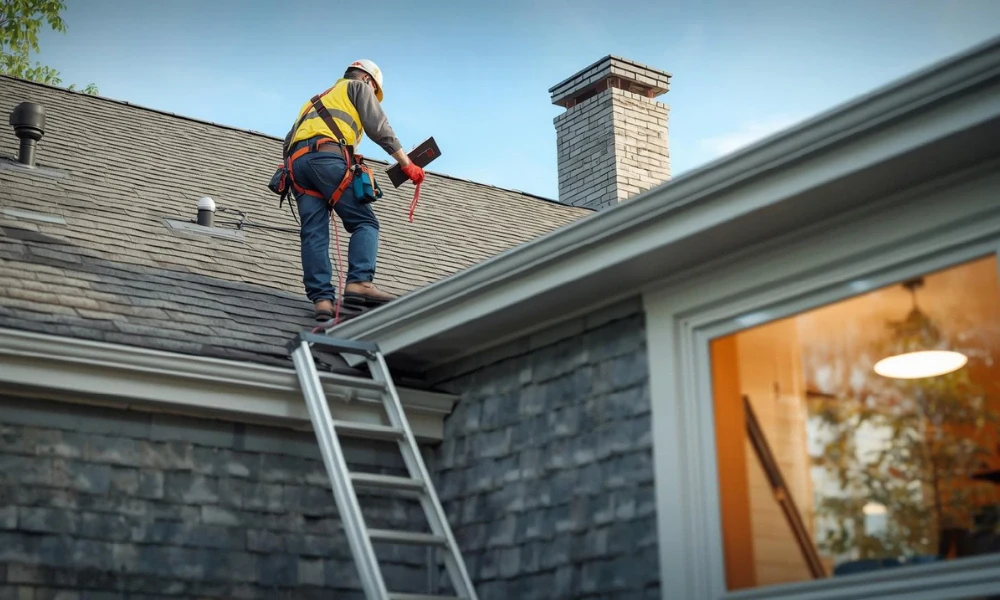
A roof inspection is a detailed diagnostic check that evaluates the waterproof seal and structural health of your home. Understanding this process helps you see how it works and its long-term benefits.
I will share how to pick the right expert, preparation steps, costs, and my own experience in the field. Let’s get started!
Key Takeaways
|
When Should You Actually Schedule a Roof Inspection?
Schedule a professional roof inspection at least once a year and right after any major storm. While annual check-ups are ideal, certain events require immediate attention. Here are four critical moments to call a pro.
- After Big Storms
Identifying this damage early after a storm is vital because professional documentation is the best way to secure your claim and avoid expensive roofing and repair work later. You should schedule an audit within 24 to 48 hours after a major hail or wind event.
- Buying or Selling a Home
Do not rely on a general home inspector alone for the roof. A specialist provides the exact service life of the shingles and can issue a roof certification. This specialized check is a smart investment considering 19.7% of home inspections uncover roofing issues that require professional attention before a sale can close.
- Before Your Warranty Ends
Most builders offer a 2-year or 5-year labor warranty. I recommend an audit six months before it expires to identify workmanship defects, such as improper flashing, that the contractor is still legally obligated to fix.
- Before Adding Solar Panels:
You must verify structural integrity before bolting heavy arrays to your house. I check the roof decking for moisture or rot; it is much cheaper to fix these issues now than to pay a solar crew to remove and reinstall panels later.
How to Choose a Professional Roof Inspector?
To choose the right professional, focus on credentials and technology rather than just the lowest price. Before you hire, verify that your expert meets these criteria:
- Ensure they hold current certifications from HAAG, InterNACHI, or the NRCA. These professionals possess the training required to identify subtle damage and material failures.
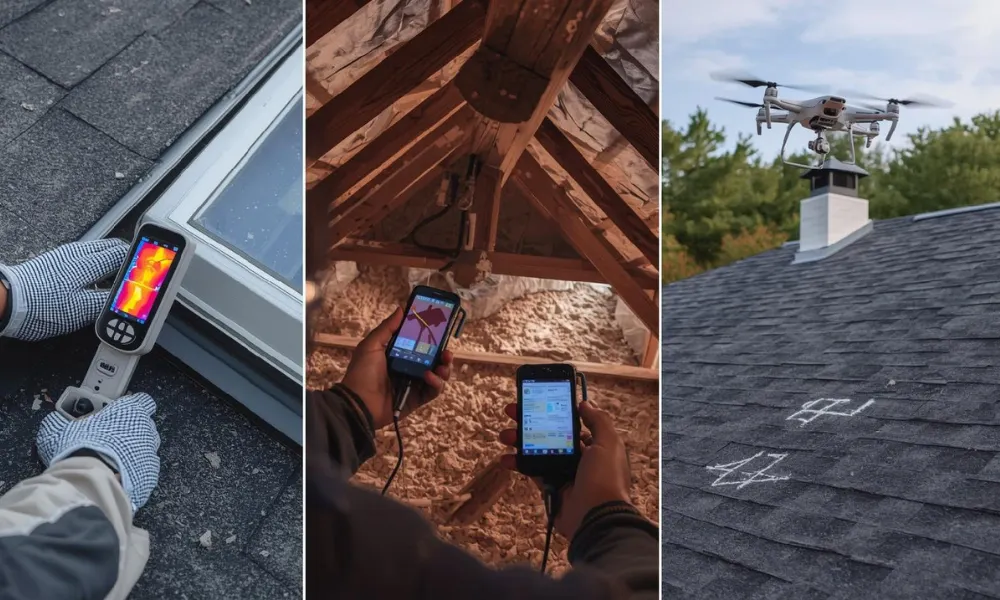
- Look for the use of technology such as infrared scanning, moisture meters, or drone roof surveys. These tools help the expert spot roof leaks in the home and locate hidden anomalies within the roof decking.
- Most certified inspectors charge a standard fee for their time and tech tools. Because these costs are not commission-based, you get an honest report on the roof’s lifespan without the pressure of a sales pitch.
I was recently called to a home where a previous free check found nothing. By performing a drone survey, I captured high-resolution angles of the chimney cap and flashing that revealed a major gap, saving the owner from a massive repair bill later that winter.
How to Prepare Your Home for the Inspector?
Preparing your access points in advance allows the expert to work efficiently and protects your belongings. When I arrive, I appreciate it when the path to the attic is already clear. You can prepare your home by following this checklist:
- Clear the attic path: Move any clothing or storage bins so there is a direct 3-foot radius to set up a ladder.
- Unlock your gates: Inspections involve opening gates and moving through living spaces. Keeping pets in a secure room prevents them from slipping outside.
- Prepare the roof: I need full access to the yard to check the roof valleys and eaves from every angle. Assure the roof and yard are clear for inspection access.
- Ensure the working space: Move delicate patio furniture or plants away from the eaves. Sometimes debris falls during a manual shingle check.
- Gather your records: Have recent repair receipts or your warranty handy. This helps me verify warranty compliance and cross-reference past work with the current structural integrity.
What Happens During Each Phase of the Inspection?
A professional roof inspection is a three-part diagnostic process that moves from a detailed exterior surface survey to an internal attic health check, often concluding with advanced technologies such as drones or infrared scans.
Phase I: The Exterior Surface and Components
This phase is a technical survey designed to identify material wear and structural vulnerabilities. I look for subtle signs of aging that indicate the system’s true health:
- Low-Slope/Flat Roofs
On these systems, I look for ponding water or seams that have begun to delaminate.
- Standard Sloped Roofs
Here, I focus on the drip edge and eaves to ensure water is diverted into gutters rather than rotting the fascia boards.
- Flashings and Seals
I check the step flashing around chimneys and the counterflashing on walls to ensure seals haven’t dried out.
- Roof Valley Integrity
Valleys channel the highest volume of water; any debris or shingle lifting here is a primary red flag. These areas handle the highest volume of water runoff. Without a properly installed drip edge or tight flashing, water will wick backward and rot the wood at the roof’s edge.
- Water Management Systems
I inspect the roof valleys and drip edges for debris or corrosion, as these are critical for understanding the purpose of the gutters on the home and how they redirect water safely away from the foundation.
Phase 2: The Attic and Interior Check
The attic reveals how well your roof is actually performing. This 20-minute diagnostic confirms structural integrity from the inside out:
- Thermal Audits
Infrared scanning helps identify cold spots that indicate wet insulation. On a hot day, a wet patch of insulation will appear as a cool purple or blue streak on my camera, signaling a hidden leak.
- Moisture Mapping
I use a moisture meter to test the roof decking for water stains or rot. Identifying these red flags early is the primary way to prevent internal leaks that lead to water damage.
- Ventilation Balance:
I check that airflow moves correctly between soffit vents (intake) and ridge vents (exhaust). Checking the roof vents is essential to ensure insulation does not block the intake vents. Blocked vents can cause attic temperatures to reach 65°C/149°F, effectively cooking your shingles from below.
Phase 3: Specialized Tooling
Depending on the specific needs of the property and my credentials (such as HAAG or InterNACHI), I use advanced technology to document findings for your report:
- Drone Roof Surveys
The 4K aerial photography provides a safe, detailed view of steep or dangerous slopes. Using a drone to get a top-down view of a 3-story chimney cap that is too high to reach safely with a standard ladder.
- Impact Bruising Tests
This involves checking a test square to document storm damage. For example, if I find more than 8–10 hail hits in this square, it provides the evidence-based documentation needed for insurance claim support, often triggering a full replacement.
Why is an Inspection Necessary for a New Roof?
A new roof inspection serves as a quality audit to ensure the contractor followed strict manufacturer specifications. Many homeowners assume new means perfect, but even high-end installs can have hidden errors.
As a key part of exterior remodeling, a roof must be installed correctly to protect the rest of the home’s upgrades. If an inspection reveals the wrong underlayment was used or the drip edge is missing, a future insurance claim could be denied.
Furthermore, these installation errors often lead to poor energy efficiency, as a damaged roof affects utility bill performance over time. Verifying that work meets ASTM standards and local ICC codes is the only way to ensure a long-term warranty stays valid.
Essential protections include:
- Ensures the manufacturer honors their 30 or 50-year promise.
- Confirms that proper nailing patterns and flashing can survive extreme weather.
- Provides proof of code compliance for premium discounts.
I once audited a three-day-old roof and found the crew skipped the starter strip along the eaves. Because the homeowner had a report, the company fixed it the next day for free. Without that check, the first heavy wind could have stripped the shingles right off the house.
What Information is Included in the Inspection Report?
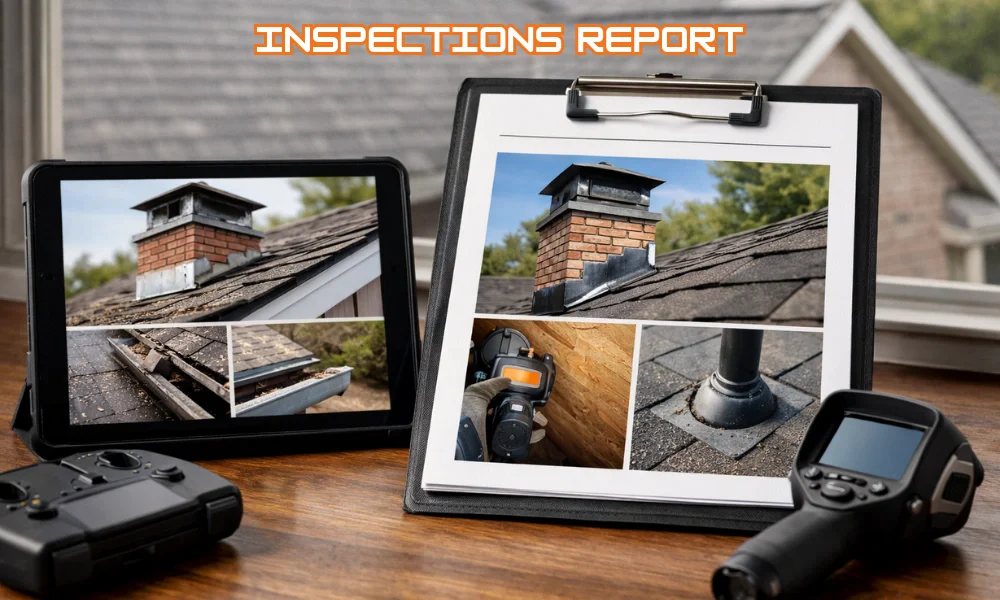
All data is compiled into a technical report that serves as a formal record of the condition. At Texas Pro Remodeling, we ensure this document provides a data-backed analysis:
- Photo Evidence
I provide high-resolution photos of critical components like the chimney cap, drip edge, and pipe boots. This visual evidence acts as a timestamp for your roof’s condition.
It proves that the waterproof seals at these high-risk transition points are intact and properly flashed. This level of detail is essential since wind and hail perils made up 51% of all property insurance claims; you need clear proof to secure a successful claim.
- Scientific Data
This includes the objective results from specialized testing, such as infrared scanning for thermal anomalies or moisture mapping of the roof decking.
- Safety & Standards Check
I perform a cross-reference check to verify that the system meets current ASTM standards and NRCA guidelines. This confirms that the materials used and the installation methods, such as specific nailing patterns or underlayment weight, adhere to the manufacturer’s requirements for a valid warranty.
- Prioritized Action Plan
Findings are categorized into urgent structural fixes versus routine preventative maintenance. This allows you to manage your budget effectively; for example, I might recommend resealing a pipe boot immediately to prevent a leak while noting that your ridge vents only require a standard cleaning in the next six months.
For instance, if I determine the shingles have eight years of life left, you can start a fund now. In one case, I recommended a homeowner prioritize a new roof over a kitchen remodel to protect their interior investment.
What Should You Not Expect From a Roof Inspection?
To provide an unbiased assessment, a professional audit has specific boundaries:
- No On-the-Spot Repairs: Inspector’s job is to diagnose, not to fix. Performing repairs during an audit would be a conflict of interest.
- No damage Audit: Inspectors do not pull up materials. They use technology like thermal imaging to see through layers without causing damage.
- No Future Guarantees: An audit estimates remaining service life, but cannot predict future storm damage.
- Not a Repair Quote: A roofer’s estimate tells you what they charge. An inspector’s report is a technical document that describes the condition of the structure.
Get Your Professional Roof Inspection Started Today, Call Now!
A professional evaluation is your primary defense against hidden leaks and expensive structural issues. By combining expert certifications with advanced diagnostic tools, you receive a clear roadmap for your home’s safety and maintenance needs.
To ensure your long-term protections remain valid and your structure stays secure, contact Texas Pro Remodeling to schedule your next inspection and protect your investment. Booking a certified inspector now can save thousands in future repairs.
Frequently Asked Questions
How much does a professional roof inspection cost?
A standard inspection typically costs between $150 and $400, while advanced evaluations involving drones or infrared scanning range from $400 to $600. Investing in a paid audit ensures an unbiased report for insurance or warranty claims rather than a sales pitch for repairs.
What is the biggest red flag for a roof?
A visible dip or sag in the roofline is the most serious indicator of a weakened structure. While surface damage is often easy to fix, a sag suggests the internal support beams or wooden decking are failing and require immediate attention.
Do I really need to be home during the inspection?
Yes, you should be present to provide safe access to the interior. This allows the pro to complete the indoor portion of the audit in about 20 minutes before finishing the exterior evaluation.
Which should I choose: an independent roof inspector or a licensed roofer?
An independent inspector provides an unbiased technical report ideal for insurance or home sales because they don’t sell repairs. A licensed roofer is the better choice when you already have damage and need a price estimate for the actual construction work.
How often should I schedule a roof inspection if I live in a storm-prone area? In regions prone to high winds or hail, you should have your roof inspected twice a year, ideally in the spring and fall, and after every significant storm.