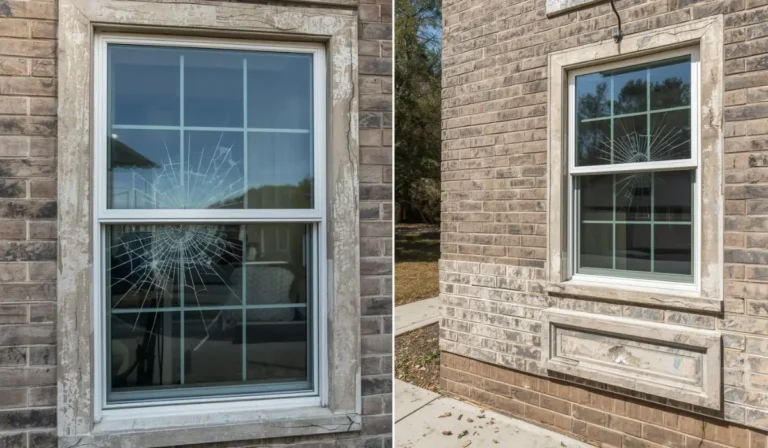
Floor leveling in older Dallas homes requires flatness testing and budgeting for grinding or self-leveling, as shifting clay soil can cause subfloor dips and joint failure.
I recently helped a Dallas homeowner who found a floating floor after pulling up old carpet. For once, they could see the true shape of their home’s foundation. I know that identifying floor-leveling issues and testing flatness can be challenging for homeowners.
That’s why I have noted down the floor leveling surprises, testing methods, and effective budgeting strategies.
Key Takeaways
|
What Are Common Floor Leveling Surprises in Older Dallas Homes?
Floors in older Dallas homes become uneven due to the high clay content in North Texas soil, structural wood rot in pier-and-beam systems, and the padding illusion that hides subfloor damage until demolition.
Here is why the floors in older homes in Dallas-Fort Worth become uneven.
Carpet Padding Hides Uneven Floors

Carpet and thick foam padding mask subfloor crowns and ridges by bridging over low spots and compressing over high spots, making a wavy floor feel flat to the touch.
I have walked into dozens of Dallas remodels where the homeowner swore their floors were level. Once the demo crew pulled up the old 7/16-inch padding, the bouncy part was visible
The padding acts like a soft mask; it hides the truth until you try to install a hard surface like LVP or tile that can not bend.
Foundation Movement
In Dallas, expansive clay soil causes concrete slabs to heave or settle unevenly.
- In wet springs, clay swells and pushes concrete upward.
- In dry summers, it shrinks, leaving gaps.
- This push-and-pull creates permanent ridges and dips.
According to ASCE estimates, about one-quarter of all U.S. homes experience some damage from expansive soils, and expansions of 10% or more are not uncommon.
Sagging Joists in Older Pier and Beam Homes
Older pier and beam homes experience joist deflection, where wooden support beams bend or sag due to age, moisture, and the weight of the house.
I recently inspected a 1940s cottage in the M-Streets. Gravity and humidity caused the floor joists to sag, creating typical flooring problems Dallas homeowners face. These structural dips often require shimming before any new flooring can be installed.
This aging creates deep floor bowls that appear once the carpet is removed. In historic Dallas homes, joists often sag 1–2 inches over 12 feet, needing structural shimming before new flooring.
How to Test for Floor Flatness?
Checking for flatness rather than just levelness using a 10-foot straightedge or a 360-degree laser level to find dips and humps. This step is a vital part of the flooring installation process to ensure the new surface stays stable.
Here is how you can test the flatness of the floors:
Straightedge Test For Floor Flatness
Use a 10-foot straightedge to bridge across the floor and identify surface gaps that exceed the flooring manufacturer’s tolerances.
- Ensure the subfloor is free of debris, staples, or old adhesive.
- Lay a professional 10-foot aluminum straightedge flat across the floor surface.
- Sweep the straightedge in a clock pattern to check multiple angles from a single center point.
- Look for gaps where the floor dips away from the bottom of the straightedge.
- Use a feeler gauge or a stack of coins to measure the height of any visible gaps.
- Use a pencil to circle any areas that fail the tolerance test for grinding or filling.
I never trust a piece of wood for this; I always use a rigid aluminum bar. You should use this method to check before you buy flooring so you know exactly how much prep work your subfloor requires.
Using a Laser Level to Find High and Low Spots
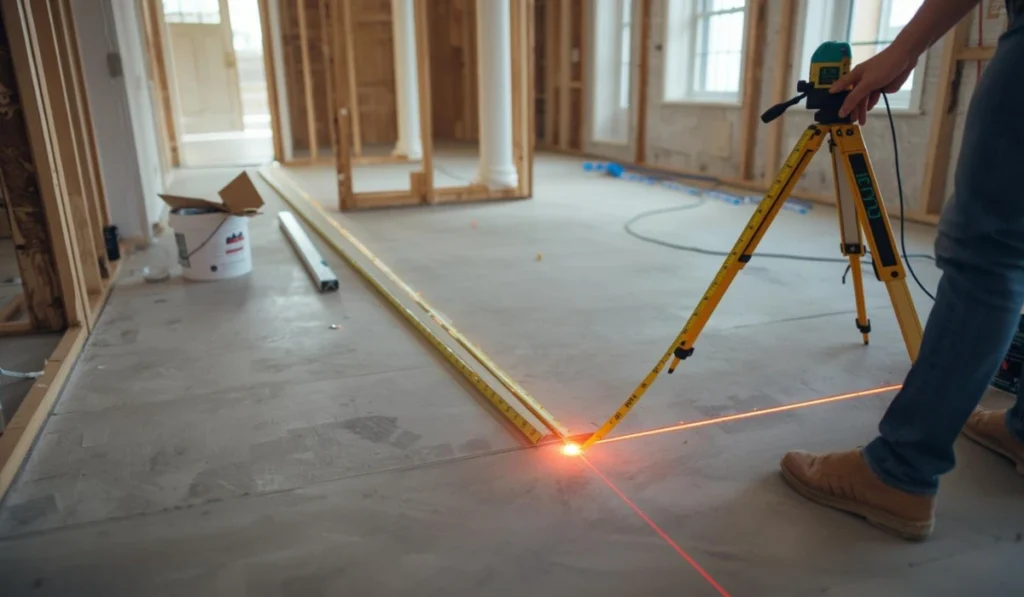
To map floor flatness, project a horizontal beam using a 360-degree laser level and measure the distance to the floor at multiple points to identify precise high and low spots.
- Place a 360-degree laser level in the center of the room on a stable tripod.
- Project a perfectly horizontal line across all walls and the floor surface.
- Use a tape measure to check the vertical distance from the laser beam to the floor.
- Measure every 2 to 3 feet across the room to create an “elevation map.”
- Mark areas where the measurement is shorter (high spots) or longer (low spots).
- Use these measurements to calculate the exact amount of leveling material needed.
At Texas Pro Remodeling, we use this method for open-concept Dallas homes to avoid estimation guesswork. One mapping session revealed a hidden valley that required double the expected material, preventing a mid-project budget crisis.
| Expert tip: Use a story pole (a stick with a marked baseline) instead of a tape measure for faster visual checks. This method identifies substrate deflection that a standard bubble level will completely miss. |
How to Fix Minor Uneven Floor Problems?
Minor floor issues are typically fixed using cementitious patching compounds to fill small valleys or by selecting flexible flooring materials like LVP that can safely follow a slight, smooth slope.
Using Patching Compound for Small Low Spots
Patching compound is used to spot-fill localized low spots or smooth out rough concrete textures where the dip is less than 1/2-inch deep. Follow these steps to fix the floor problems:
- Use a cementitious patch material when I only have a few specific valleys to fix.
- You mix a small batch, trowel it into the low spot, and use a feather finish technique to blend the edges until they are paper-thin.
- It helps avoid vinyl plank problems like joint separation or hollow sounds later. It is much faster and cheaper than pouring a liquid leveler over the entire room.
- A single 10-pound bag of feather-finish patch can cover up to 300 square feet if you areskim-coating minor imperfections, making it a highly cost-effective fix for newer Dallas homes.
Choosing the Best Flooring Options for Slightly Uneven Floors
The best choices for slightly uneven floors are floating floors like Luxury Vinyl Plank (LVP) and engineered wood, which can handle minor, gradual slopes without cracking or joint failure.
For slightly uneven floors, floating materials like LVP or engineered wood are ideal. They can flex over minor dips and slopes without cracking or showing gaps. Rigid materials such as tile or stone show lippage, and high-sheen finishes make humps obvious. This is a key point to consider before choosing glossy floors for an older house.
| Flooring Type | Tolerance for Uneven Floors | Risk on Uneven Substrate | Best Use |
| Luxury Vinyl Plank (LVP) | 3/16″ over 10 ft | Low | Older homes with gentle slopes |
| Engineered Wood | 3/16″ over 10 ft | Low–Moderate | Structurally sound subfloors |
| Porcelain / Ceramic Tile | 1/8″ over 10 ft | High (lippage risk) | Only on very flat substrates |
| Natural Stone | ≤1/8″ over 10 ft | Very High | Requires professional flattening |
I recommend choosing Luxury Vinyl Plank (LVP) if you want a durable, low-maintenance floor that handles minor unevenness well. Otherwise, select Engineered Wood if you prefer a wood look but still need some flexibility over gentle slopes. Avoid rigid materials like tile or natural stone unless your floor is perfectly flat.
When Uneven Floors Require Major Repairs in Older Dallas Homes?
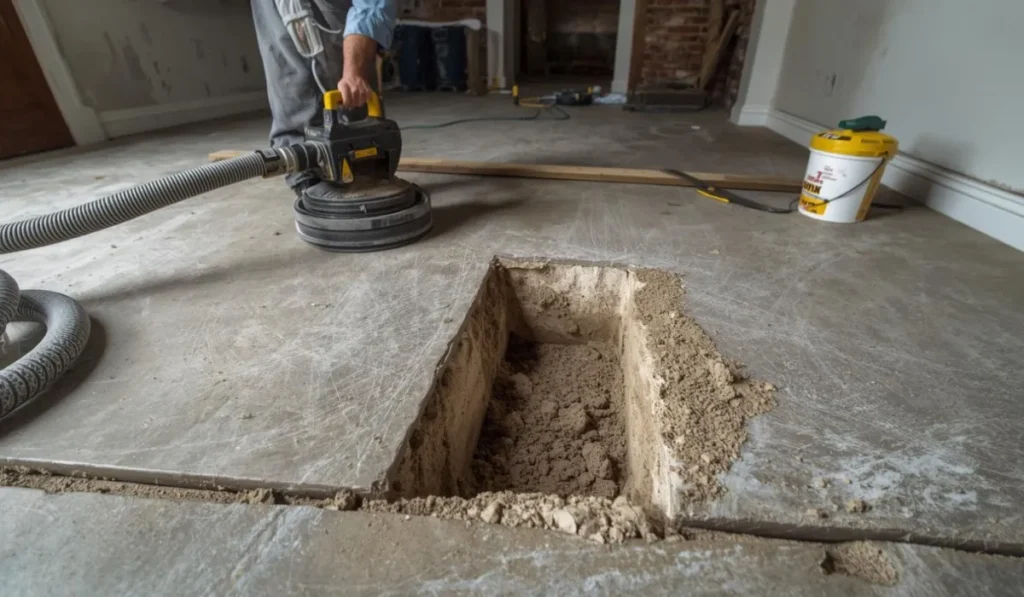
Severe floor issues need mechanical or structural repairs before installing new flooring. During these major substrate adjustments, it is common for the vibration or shifting to require minor drywall repair on adjacent walls. Here’s how I handle them in older Dallas homes.
- Grinding Down High Concrete Spots
Use a diamond-blade grinder to shave ridges and humps. You can not just fill a peak, you must remove it to create a flat starting surface. To understand the force behind these ridges, consider that the free swelling ratio of microscopic clay particles can reach as high as 135 %, physically altering the concrete’s profile.
- Preventing Speed Bump Floors
Even a 1/4-inch concrete ridge can feel like a permanent speed bump under luxury vinyl planks. Grinding takes only minutes but prevents long-term issues.
- Dust Control and Surface Prep
To keep your home clean, we use a HEPA dust control system that vacuums up fine powder as we work, supporting safer cleaning routines for Dallas homes. For smooth or oily concrete, use shot blasting to roughen the surface. Ensure a clean, permanent bond for any patches or adhesives applied later.
- Pouring Self-Leveling Underlayment (SLU) for Deep Dips
Check slab moisture, apply primer, and pour SLU into valleys. It flows like syrup, creating a perfectly flat surface. Curing usually takes 24–48 hours. One 50-pound bag covers 25–30 sq. ft. at 1/4-inch thickness.
- Fixing Foundation Issues First
Structural repairs tackle the root cause, such as sagging beams or sinking piers. Options include sistering joists, shimming subfloors, and tightening fasteners to stop squeaks. In older Dallas pier-and-beam homes, sistering a 2×10 joist can remove a 1-inch sag, something no amount of liquid leveler can fix.
| Expert Note: Check for hidden moisture or termite damage before lifting joists. Adding extra blocking or piers can prevent future sagging and protect your floors. |
How to Budget for Uneven Floor Correction?
Budgeting for floor prep means keeping aside a contingency fund in your initial quote to cover the labor and materials discovered only after your old flooring is removed. The most honest way to budget is to assume some level of correction will be necessary. Planning for this early prevents stressful mid-project surprises.
Always Include A Floor Prep Allowance Upfront
A floor prep allowance is a preset budget that covers typical grinding, patching, or leveling costs for North Texas subfloors. Including it in your initial plan prevents surprise change orders once the old flooring is removed. In my experience, a range of $1.50–$3.00 per sq. ft. works well for most homes.
Estimate Your Allowance Based On Room Size
For a 500 sq. ft. living room, a $2.00/sq. ft. allowance ($1,000) usually covers several bags of self-leveler and a few hours of grinding. If the floor turns out perfectly flat, you keep the money. If it’s uneven, you’re already prepared.
Understand Cost Drivers
- Self-leveler bags: Deeper dips require more bags. One bag typically covers ~25 sq. ft. at 1/4-inch thickness.
- Labor for grinding: Older or harder slabs take more time and increase diamond-blade wear.
- Materials: Proper substrate preparation helps prevent floor gaps and ensures primers and patching compounds bond correctly.
Plan For High-Impact Scenarios
For example, a deep valley could require 15 bags of premium self-leveler at $40 each, plus primer and 4 hours of labor, totaling $900–$1,200 for a single area. Factoring this in early avoids budget shocks and keeps your remodel on track.
Conclusion
Floor leveling is the most critical step for a successful Dallas remodel. You must move beyond the padding illusion by using a straightedge to identify hidden dips and ridges before your new flooring arrives.
Budgeting for a prep allowance and addressing structural issues ensures your LVP or tile remains stable for years. Proper substrate preparation prevents joint failure and avoids expensive installation delays.
Ready for level, stable floors in your Dallas home? Schedule a professional subfloor inspection and prep with Texas Pro Remodeling. Contact us today.
Frequently Asked Questions
Why Did My Flooring Quote Go Up After Demo In An Older House?
In Dallas, carpet masks high spots and low spots. Once the substrate preparation scope is visible, contractors must adjust for the actual volume of self leveling compound needed.
What causes tile lippage even with good installers?
Tile lippage risk usually comes from an uneven substrate. Large-format tile flatness requirements are strict because the tiles cannot bend over humps.
How Do I Avoid Flooring Installation Delays From Prep?
Ensure that a moisture check and concrete crack repair are done early. Curing time for self-leveler can take 24-48 hours, so plan your timeline accordingly.
How Do I Find Joist Sag In A Pier And Beam House?
Look for bouncing or subfloor squeaks. Fixing these requires sistering joists or blocking before applying any patching compound.
Can Leveling Raise My Floor Enough To Create Transition Problems?
Yes. Finished floor height buildup can create trips. Plan your transition strips and reducers early to bridge floor height differences between rooms.